tips & tricks: hand whipped cream

yes, you read that correctly. HAND whipped cream. no matter what tools you are working with at home, as long as you have a whisk, you can make whipped cream happen.

whipped cream is one of those REALLY simple things to make at home that elevates ANY dessert. everything from fresh berries to an olive oil cake is a little extra special with some fresh whipped cream.

now, you can definitely use any of your fancy kitchen tools like stand mixers, immersion blenders and hand blenders to make whipped cream. and yes, it saves your arm the trouble, but none of those tools are necessary.

one of the keys to making good, easy whipped cream is having an ice cold bowl and very cold cream. you want to keep your metal bowl in the fridge or preferably the freezer for at least 15 minutes before you make your whipped cream.

now homemade whipped cream CRUSHES the store bought stuff, but the added benefit is that you can make it as sweet as YOU want it. you can also add just a bit of your favorite extract or zests to make whipped cream your own.

hand whipped cream

serves: 2 cups whipped cream

inactive time: 15 minutes

active time: 10 minutes

total time: 20 minutes

ingredients: 1 cup COLD heavy whipping cream. .25 cup granulated OR powdered sugar (either will work). 1 tsp vanilla extract or orange zest optional (or one tsp of your other favorite flavoring). ice cold metal bowl. whisk.

IMG_6630.JPG

start by pouring your cream into the bowl.

IMG_6631.JPG

set a five minute timer and start to whip as much air as you can into your cream. as i stood there and whisked i did a little jig, did some stretching and even got in some good yoga breathing. at about that five minute mark, your cream will be like a thick soup.

IMG_6632.JPG

pour in about 1 tbs of the sugar and set another 2 minute timer. continue whisking and in that two minutes the cream should become much more stiff.

IMG_6633.JPG

when you have soft peaks (the cream should stick to the whisk but still lose a bit of it’s shape), pour in a little more of your sugar to taste and your flavoring option. whip the flavor in until well combined and the cream has stiffened to hold it’s shape. about 1 more minute.

IMG_6635.JPG

serve your whipped cream or store in the fridge for up to a week.

IMG_6636.JPG

xo, a

hand whipped cream

serves: 2 cups whipped cream

inactive time: 15 minutes

active time: 10 minutes

total time: 20 minutes

ingredients: 1 cup COLD heavy whipping cream. .25 cup granulated OR powdered sugar (either will work). 1 tsp vanilla extract or orange zest optional (or one tsp of your other favorite flavoring). ice cold metal bowl. whisk.

start by pouring your cream into the bowl. set a five minute timer and start to whip as much air as you can into your cream. as i stood there and whisked i did a little jig, did some stretching and even got in some good yoga breathing. at about that five minute mark, your cream will be like a thick soup. pour in about 1 tbs of the sugar and set another 2 minute timer. continue whisking and in that two minutes the cream should become much more stiff. when you have soft peaks (the cream should stick to the whisk but still lose a bit of it’s shape), pour in a little more of your sugar to taste and your flavoring option. whip the flavor in until well combined and the cream has stiffened to hold it’s shape. about 1 more minute. serve your whipped cream or store in the fridge for up to a week.

baked feta + crispy chickpeas & lemon yogurt

i’m going to lead off this post with the statement that i’m not a huge fan of feta. the briny saltiness that feta and olives contain just isn’t really my thing. i purchased a bunch of feta for an event that we catered and i overestimated how much i would need for my watermelon & feta skewers. so now i have a bunch of left over feta and no clue what to do with it. after some internet research, i found some inspiration that i thought i might actually enjoy.

and now that you know all that, you should also know that i devoured this dish with feta as the star.

this dish is great as a vegetarian main dish or as an appetizer shared among friends. it is perfect with some crusty bread or pita and it was also delicious over a bed of arugula, salad style.

baked feta + crispy chickpeas & lemon yogurt

serves: 2 for a main course/4-6 as an appetizer

prep time: 10 minutes

active time: 15 mintues

total time: 25 minutes

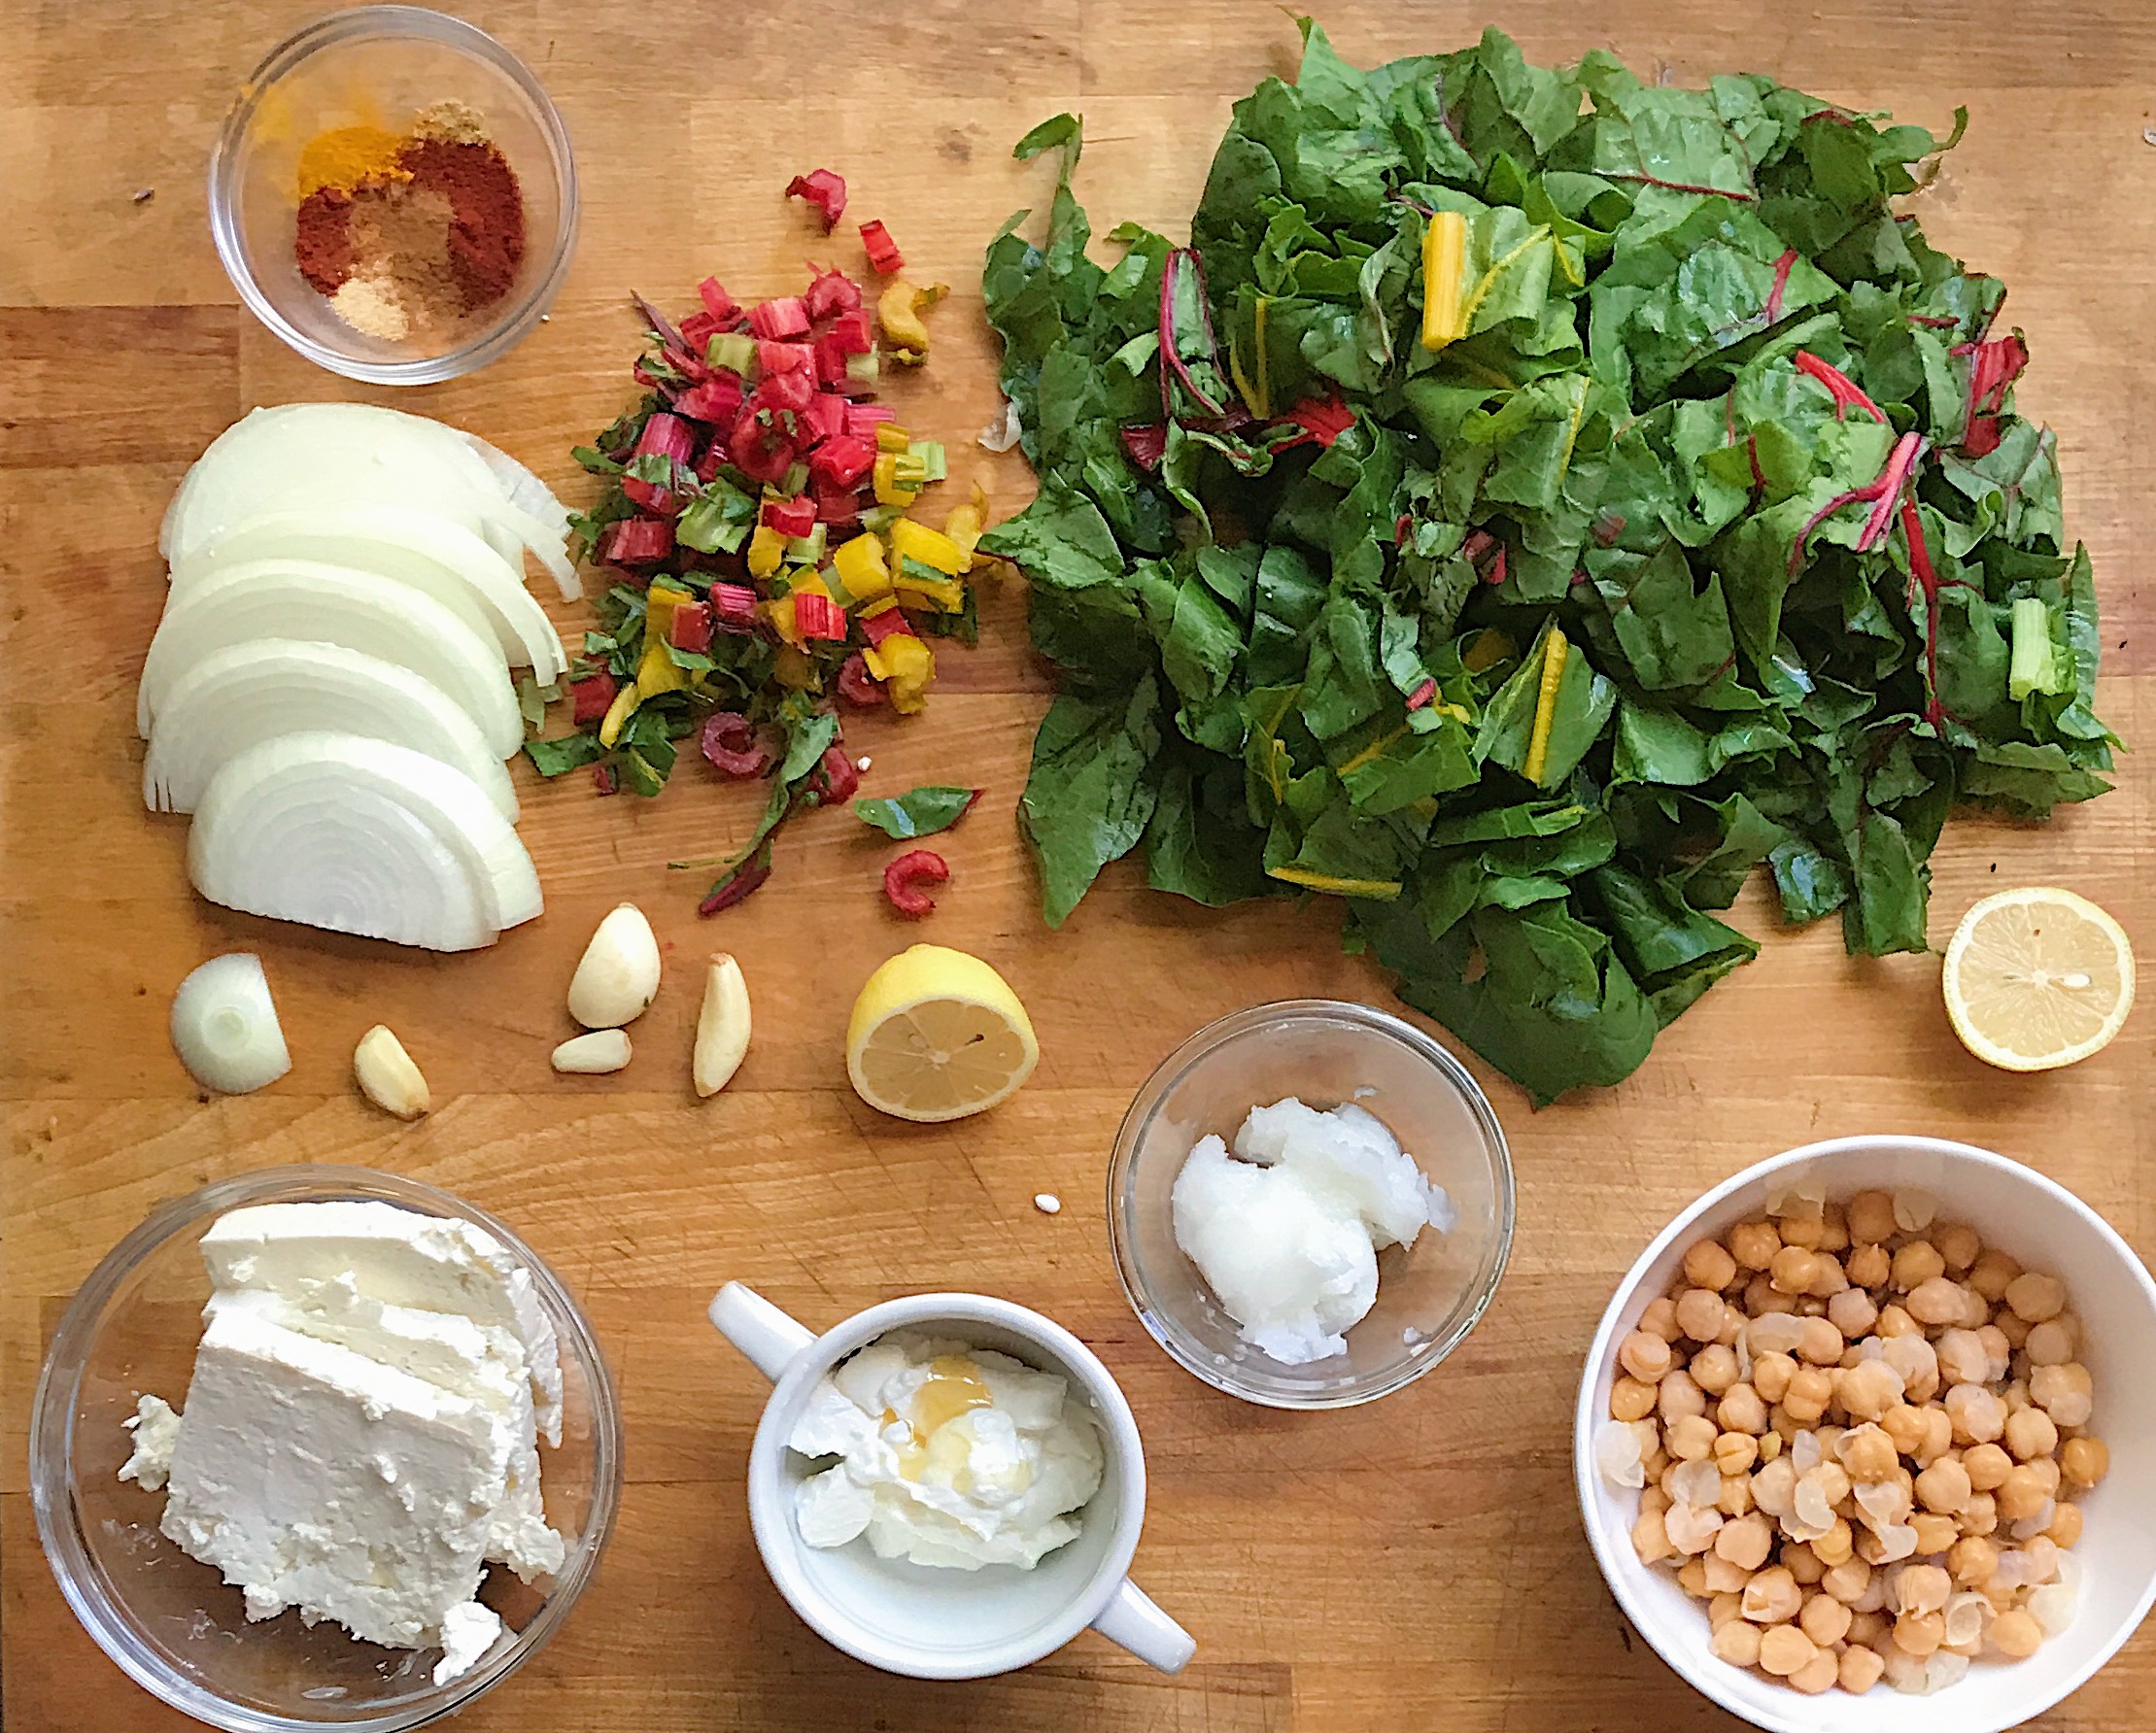
ingredients: .5 lb greek feta, sliced into .5 inch thick pieces. 1 medium brown onion, halved and sliced .25 inch thick. 1 bunch rainbow chard, stems & leaves chopped but keep the leaves and stems separate. 6 tbs of coconut oil. 15 oz can of chickpeas (also known as garbanzo beans), rinsed and dried REALLY well. 1 tsp kosher salt. .5 tsp freshly ground pepper. .25 tsp garlic powder. .25 tsp turmeric. .25 tsp paprika. .25 tsp ginger. 3 pinches of cinnamon. 4 garlic cloves, smashed. .5 cup greek yogurt. 1 tbs honey. juice of 1 lemon. large cast iron skillet (or other heavy pan that can go in the oven) and 1 large nonstick pan. lemon slices for garnish. pita, crusty bread or bed of arugula for serving.

IMG_6588.JPG

start by preheating the oven to 350 degrees f. while the oven is preheating, heat 2 tbs of the coconut oil over medium high heat until nice and hot. add in the onions and a couple pinches of salt. once the onions start to soften, add in the chopped chard stalks. cook for another 1-2 minutes till the stalks start to soften.

IMG_6591.JPG

meanwhile, combine the rest of the salt, pepper, garlic powder, turmeric, paprika, ginger & cinnamon in a small bowl. mix well till combined.

IMG_6589.JPG

add in the greens in two or three batches, waiting till the first batch is wilted before adding more.

IMG_6593.JPG

season the mixture with one third of the spice blend and stir well. place your feta pieces among the onions and greens and place it in the oven. bake for 8-10 minutes, till the cheese is nice and soft.

IMG_6594.JPG

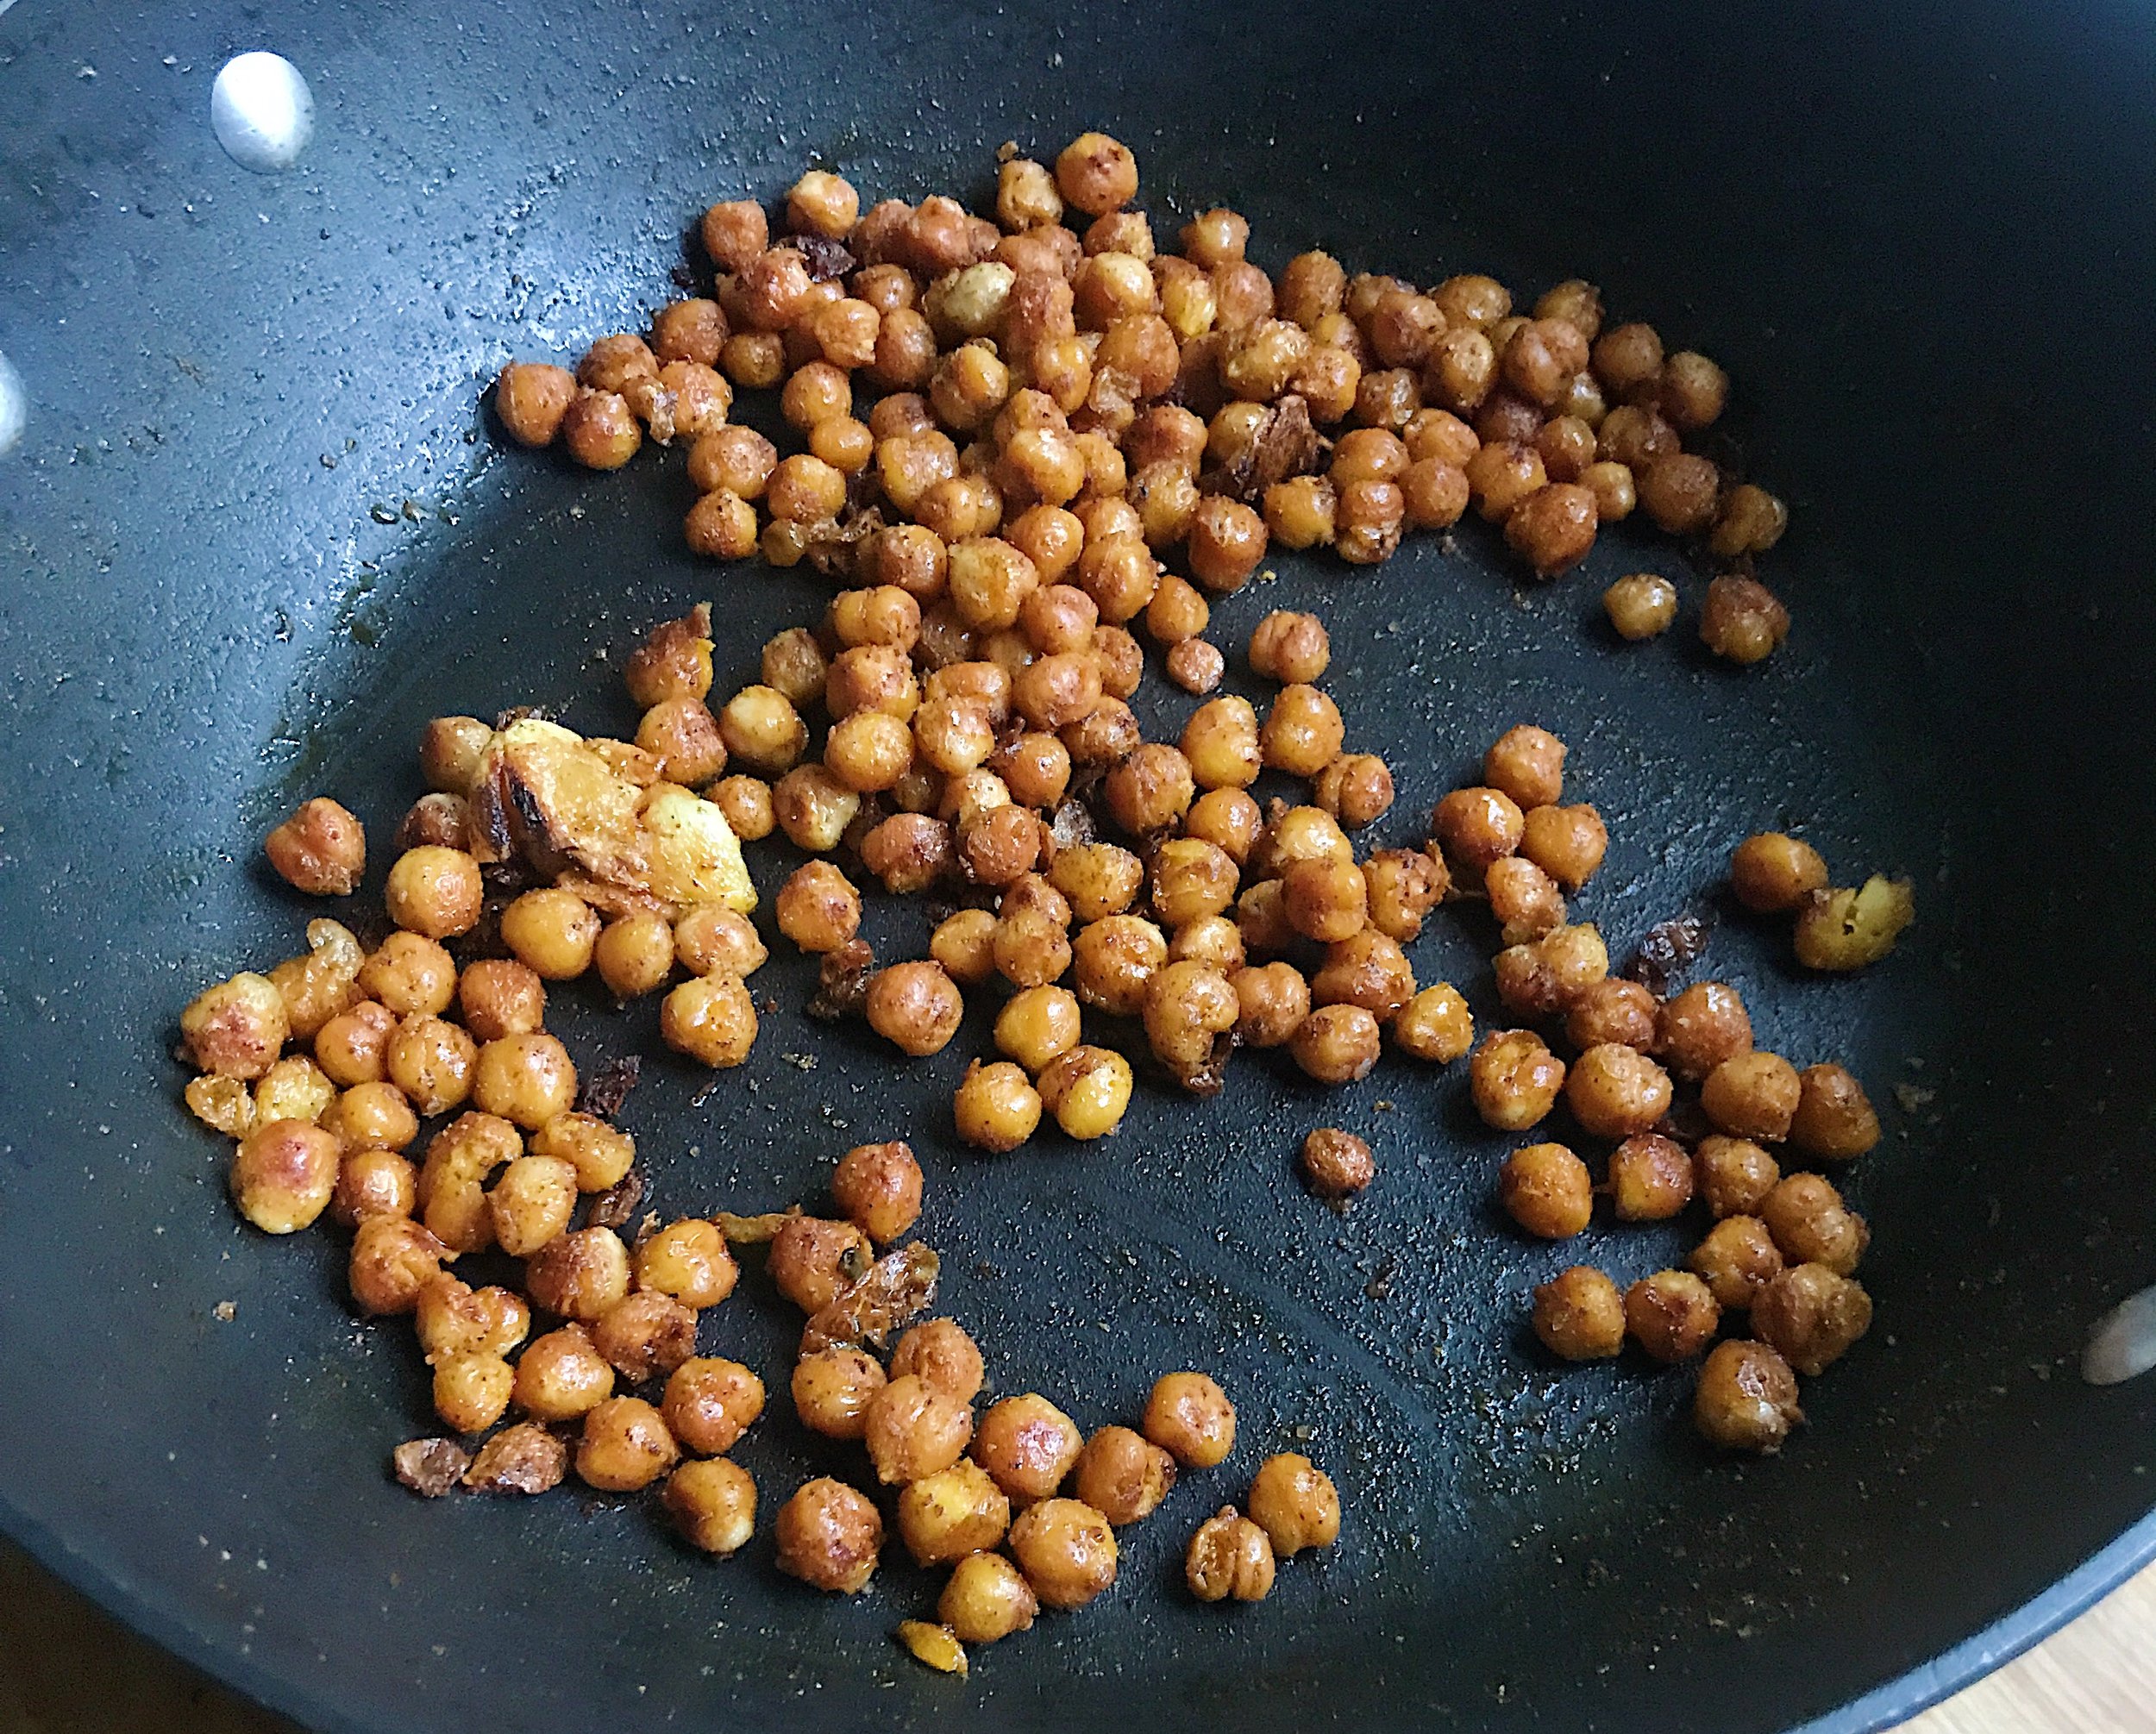
while the feta is baking, heat the remaining oil in a large nonstick skillet. if you only have a smaller skillet, work in batches so you do not over crowed your pan. if you over crowed your pan, your chickpeas will not get crispy. when the oil is really hot, you can test it with one chickpea to see if it sizzles, pour in all your chickpeas. make sure they are in an even layer with a little space in between. add in the garlic and the rest of the spice blend. toss well till the chickpeas are nice and toasted and then spread them out once again in an even layer with space. and then walk away. don’t touch them. let them crispy up. cook for 5 minutes, toss and then let them toast for an additional 5 minutes. when they are done, they look like this.

IMG_6597.JPG

while the chickpeas are crisping, mix together the lemon juice, greek yogurt and honey and set it aside. when your feta is baked, remove it from the oven.

IMG_6596.JPG

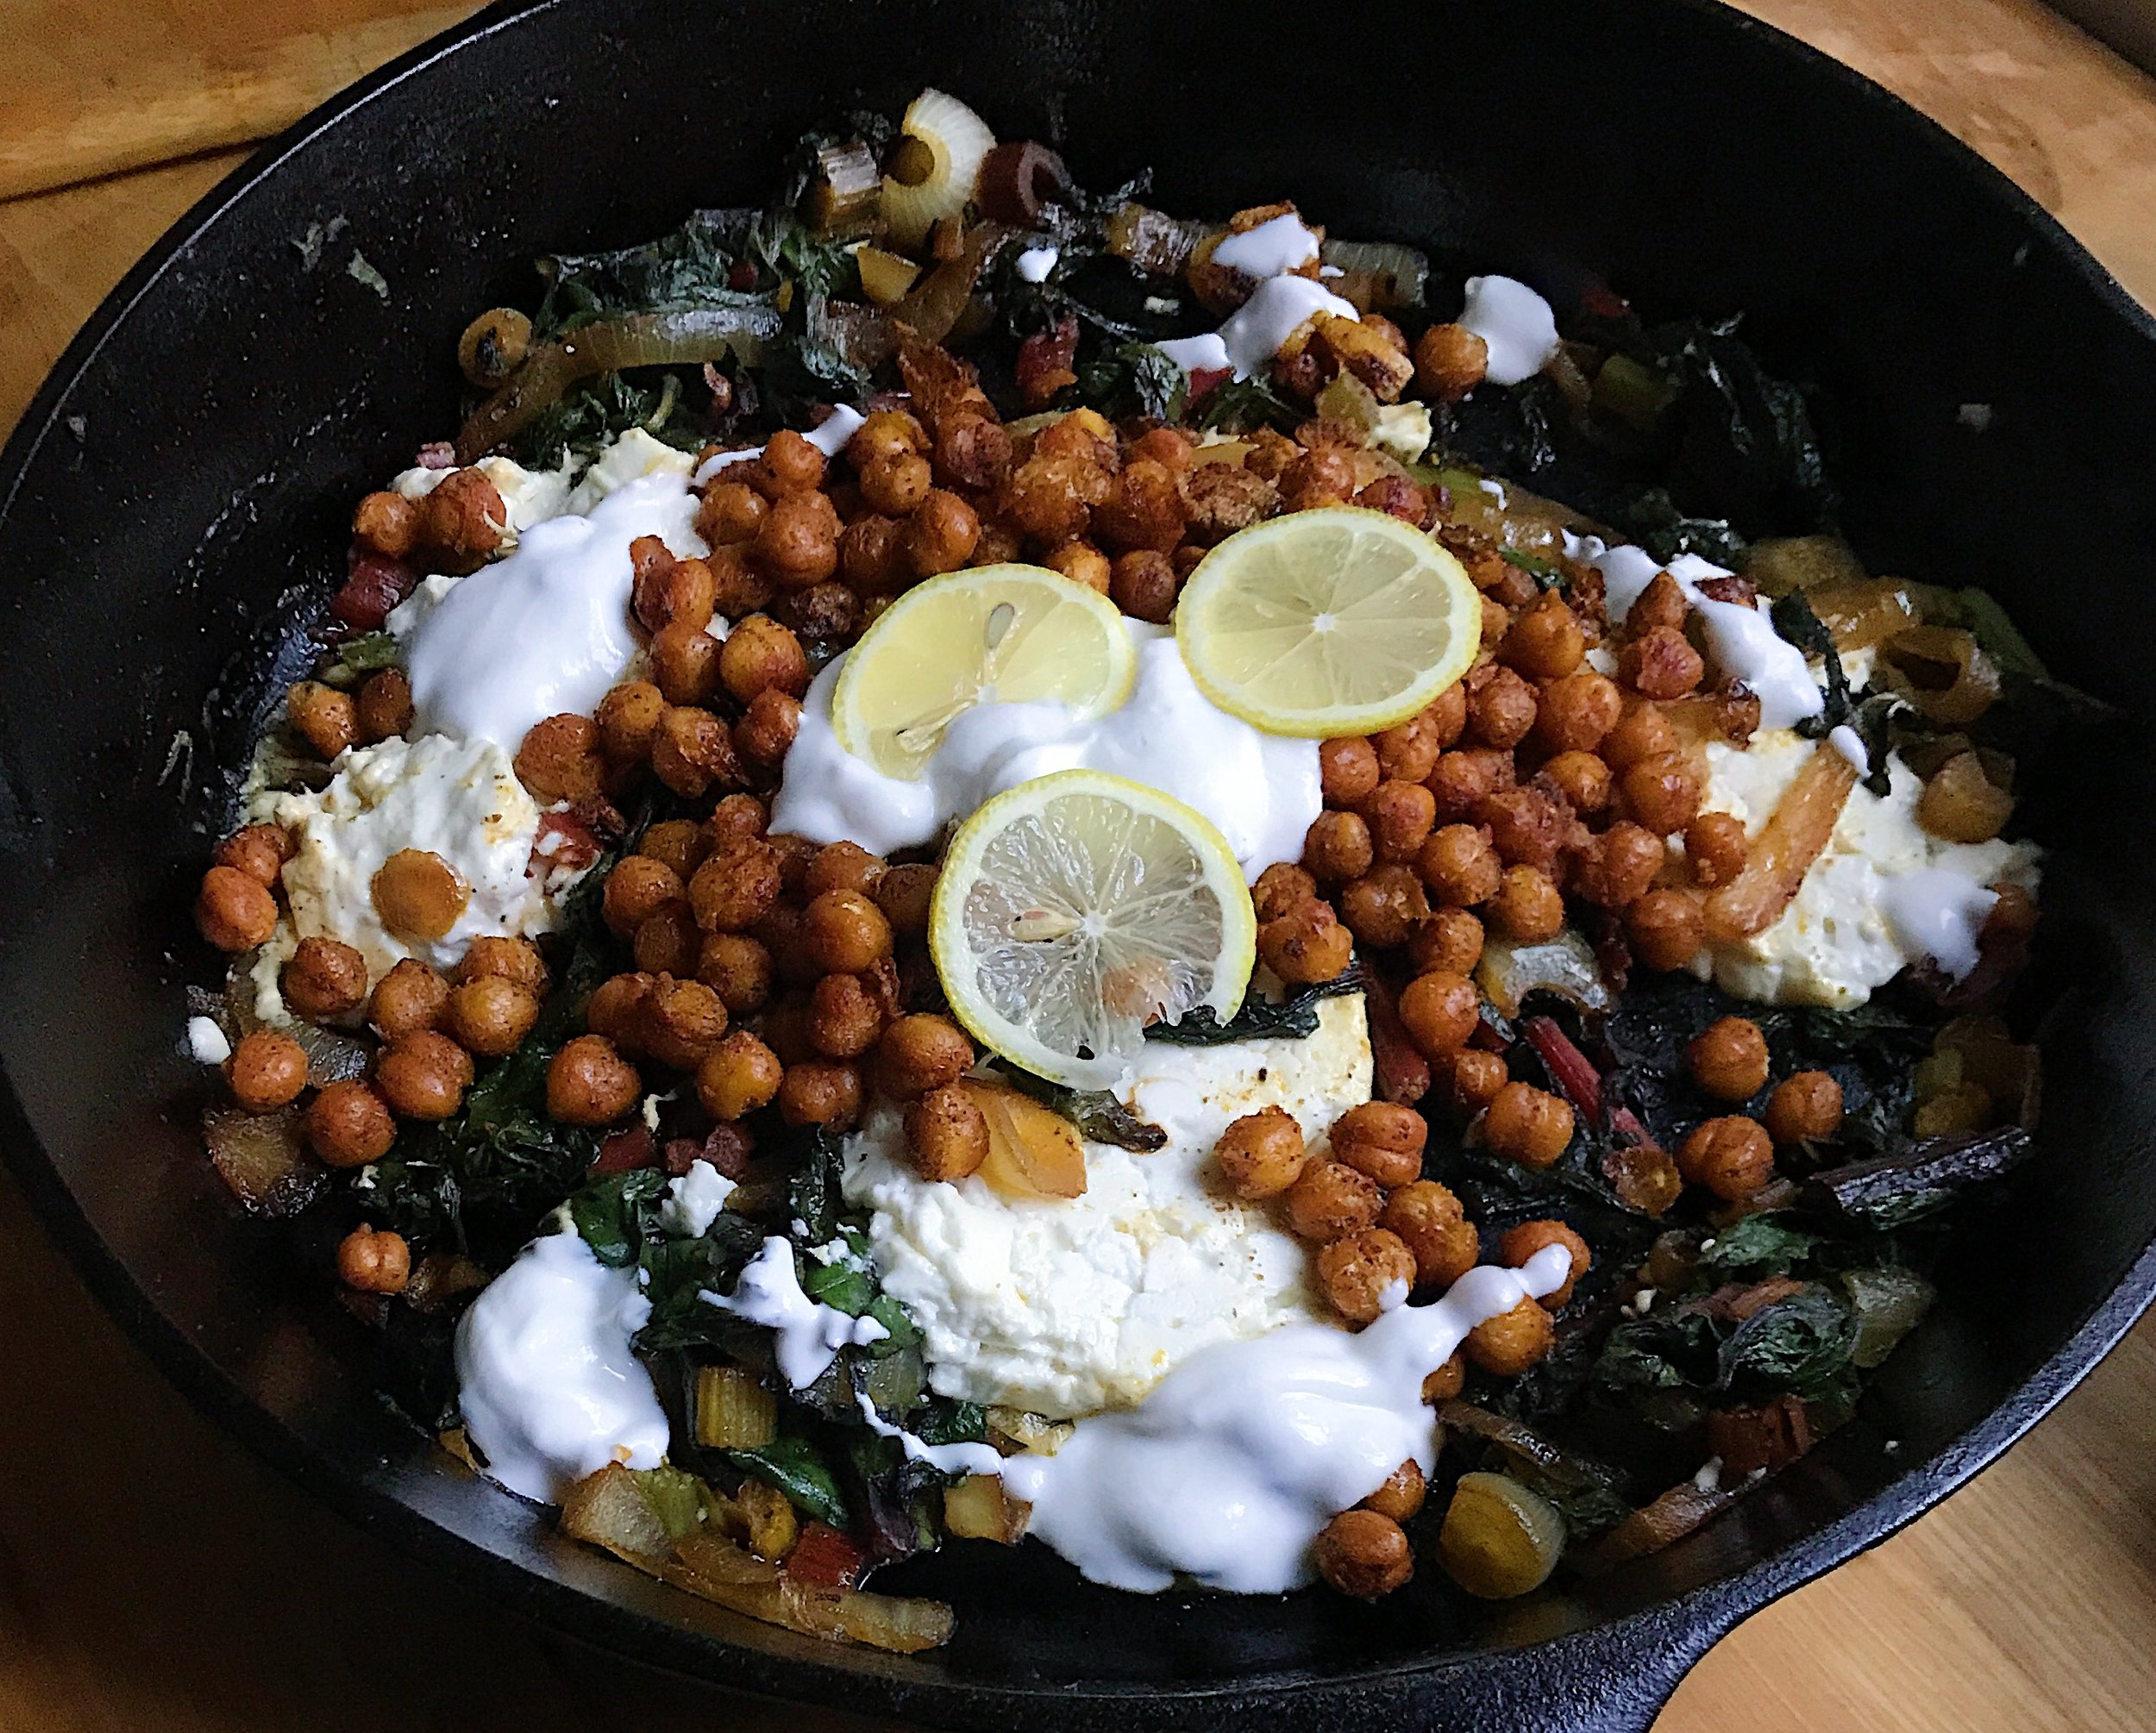
top with crispy chickpeas. drizzle some of the lemony greek yogurt on top.

IMG_6600.JPG

finally, top with lemon slices.

IMG_6602.JPG

serve with your choice of bread or over your favorite greens as a salad.

IMG_6601.JPG

xo, a

baked feta + crispy chickpeas & lemon yogurt

serves: 2 for a main course/4-6 as an appetizer

prep time: 10 minutes

active time: 15 mintues

total time: 25 minutes

ingredients: .5 lb greek feta, sliced into .5 inch thick pieces. 1 medium brown onion, halved and sliced .25 inch thick. 1 bunch rainbow chard, stems & leaves chopped but keep the leaves and stems separate. 6 tbs of coconut oil. 15 oz can of chickpeas (also known as garbanzo beans), rinsed and dried REALLY well. 1 tsp kosher salt. .5 tsp freshly ground pepper. .25 tsp garlic powder. .25 tsp turmeric. .25 tsp paprika. .25 tsp ginger. 3 pinches of cinnamon. 4 garlic cloves, smashed. .5 cup greek yogurt. 1 tbs honey. juice of 1 lemon. large cast iron skillet (or other heavy pan that can go in the oven) and 1 large nonstick pan. lemon slices for garnish. pita, crusty bread or bed of arugula for serving.

start by preheating the oven to 350 degrees f. while the oven is preheating, heat 2 tbs of the coconut oil over medium high heat until nice and hot. add in the onions and a couple pinches of salt. once the onions start to soften, add in the chopped chard stalks. cook for another 1-2 minutes till the stalks start to soften. meanwhile, combine the rest of the salt, pepper, garlic powder, turmeric, paprika, ginger & cinnamon in a small bowl. mix well till combined. add in the greens in two or three batches, waiting till the first batch is wilted before adding more. season the mixture with one third of the spice blend and stir well. place your feta pieces among the onions and greens and place it in the oven. bake for 8-10 minutes, till the cheese is nice and soft. while the feta is baking, heat the remaining oil in a large nonstick skillet. if you only have a smaller skillet, work in batches so you do not over crowed your pan. if you over crowed your pan, your chickpeas will not get crispy. when the oil is really hot, you can test it with one chickpea to see if it sizzles, pour in all your chickpeas. make sure they are in an even layer with a little space in between. add in the garlic and the rest of the spice blend. toss well till the chickpeas are nice and toasted and then spread them out once again in an even layer with space. and then walk away. don’t touch them. let them crispy up. cook for 5 minutes, toss and then let them toast for an additional 5 minutes. when they are done, they look like this. while the chickpeas are crisping, mix together the lemon juice, greek yogurt and honey and set it aside. when your feta is baked, remove it from the oven. top with crispy chickpeas. drizzle some of the lemony greek yogurt on top. finally, top with lemon slices. serve with your choice of bread or over your favorite greens as a salad.