Posts tagged how to guide
tips & tricks: frosted rosemary

whether i like it or not, the holidays are just around the corner. our november catering and cake schedule is already looking full and december is starting to add up. so i'm starting to do little things in advance that i can keep on hand during the holiday season to make my life easier. 

first up are these beautiful frosted rosemary sticks. they are beautiful in a cocktail, they can be broken up and used for small hits of pretty green on a cake or you can use a few to style up a platter that is a little bland in color and needs some holiday cheer. plus they smell AMAZING. 

frosted rosemary
serves: 4 rosemary sprigs
prep time: 1 minute
active time: 4 minutes
total time: 5 minutes
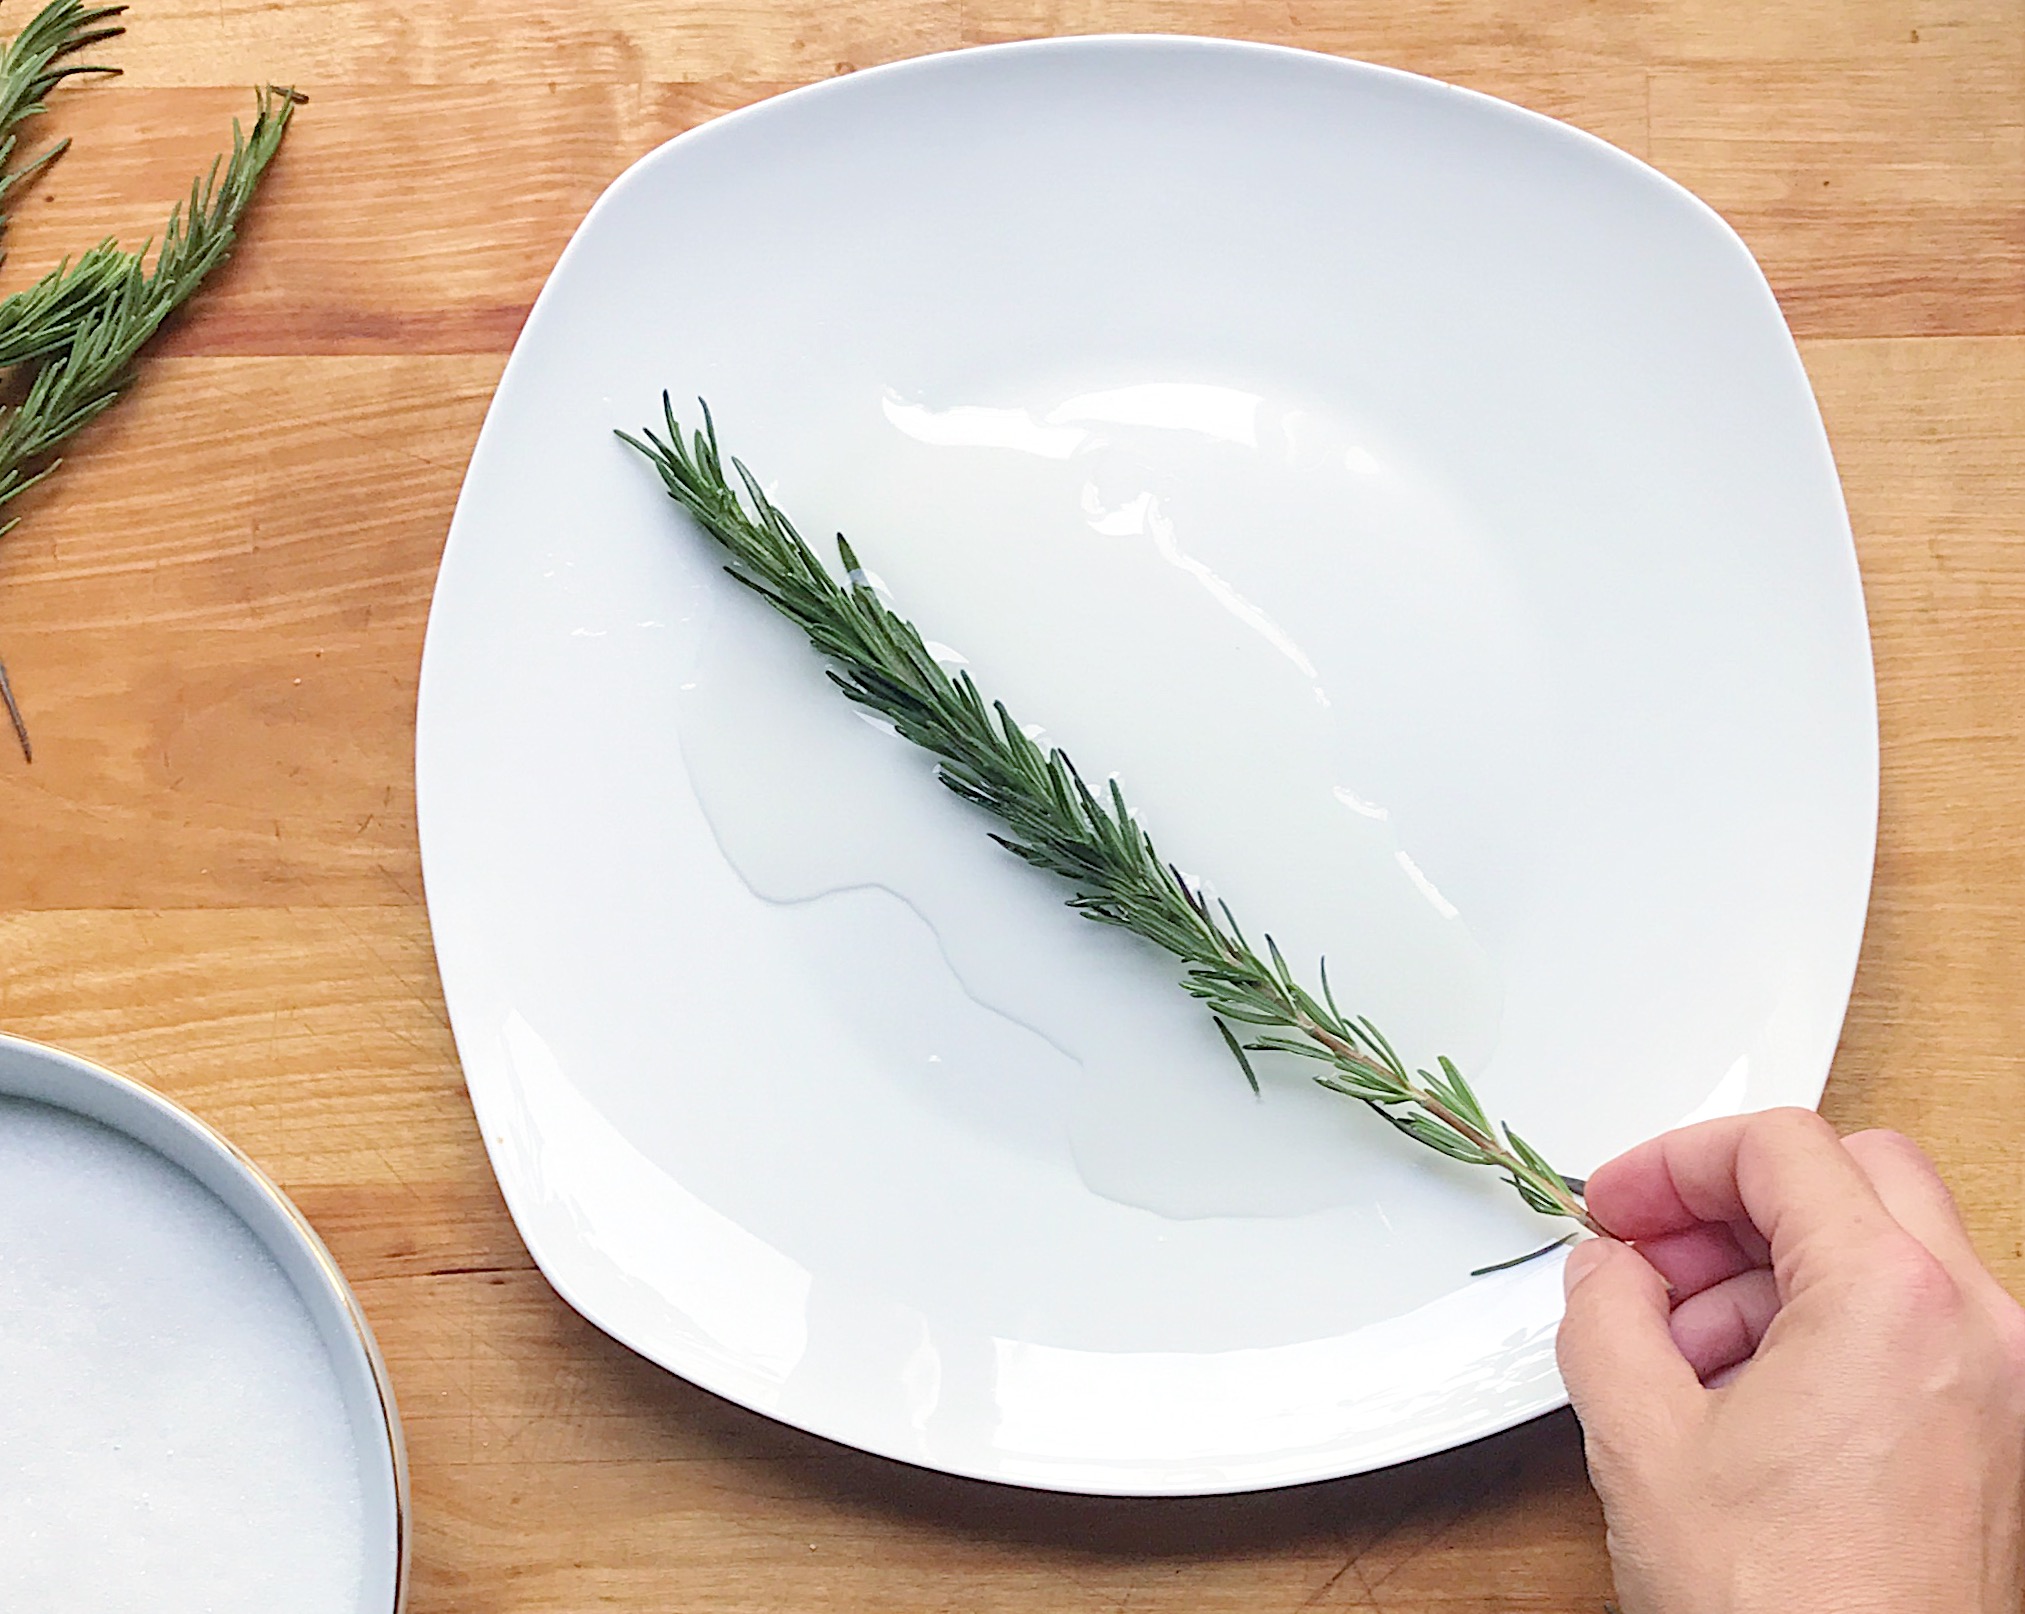
ingredients: 4 sprigs rosemary. 1 tbs simple syrup. .25 cup sugar. 1 plate. 

IMG_1489.JPG

start by pouring your the simple syrup onto your plate. gently brush your rosemary sprigs through the simple syrup one at a time. 

IMG_1490.JPG

after the sprig gets brushed with simple syrup, gently sprinkle it with the sugar. 

IMG_1492.JPG

i like to pour the sugar over a plate or bowl to catch any excess. once your rosemary sprig is frosted, set it aside on a platter or in a jar and finish the remaining sprigs. 

IMG_1493.JPG

use immediately or store in an airtight container in the fridge for up to a week. 

IMG_1495.JPG

xo, a

frosted rosemary
serves: 4 rosemary sprigs
prep time: 1 minute
active time: 4 minutes
total time: 5 minutes
ngredients: 4 sprigs rosemary. 1 tbs simple syrup. .25 cup sugar. 1 plate. start by pouring your the simple syrup onto your plate. gently brush your rosemary sprigs through the simple syrup one at a time. after the sprig gets brushed with simple syrup, gently sprinkle it with the sugar. i like to pour the sugar over a plate or bowl to catch any excess. once your rosemary sprig is frosted, set it aside on a platter or in a jar and finish the remaining sprigs. use immediately or store in an airtight container in the fridge for up to a week.

tips & tricks: knives 101

a while back, i spent a thursday tips & tricks focused on the value of having a serrated knife in your arsenal. but when it comes to knife knowledge, we were just scraping the surface. so today, i'm diving a bit deeper on all you would need to know when it comes to your knife options. 

one of the best things my professionally trained husband has instilled in me is using the right tool for the right job. and no where in the kitchen is that truer than when it comes to your knives. before we dive in on the different types of knives and what you need them for, there are a couple important things you need to know before you bust out the sharp stuff. it is CRUCIALLY important to keep your knives SHARP. more people cut themselves with dull knives after trying to force the knife through the intended slicing and dicing subject. it is recommended to use a honing steel or rod as often as you use your knives (with the exception for the serrated, that will need to be sharpened). if you use your knives regularly, you will also want to get your knives sharpened professionally every 4-6 months. less if you don't use them often. ALWAYS wipe and store your knives after use. and NEVER put your knives in the dishwasher. good knives are an investment. wes has had is first set in great working shape for almost twenty years. alright. 

now that that is covered, on to the knives!

IMG_0837.JPG

now, the above labelled knives are just a wee bit of what is actually out there in the way of knives, but these are the knives i think are the most valuable for the home cook who really wants to crush it in the kitchen. remember, the right tool for the right job is vital to safety and ease. now some of the above knives are really specialty. the main knives you want to prioritize having on hand are the paring knife, chef's knife and the serrated knife. with those three, you should be able to accomplish any task. but to make things even easier you could invest in the following knives

  • slicing knife - amazing for slicing larger meats like prime rib and brisket or slicing cake layers like butter.

  • santoku - a smaller alternative to a chef's knife. a great all around knife that is also great for scraping things from a cutting board due to it's wide blade. i was personally very drawn the santoku knives in the beginning because i have small hands and it was much more manageable when i my knife skills were not yet up to snuff. 

  • steak - perfect for giving to your guests when serving steak, chicken or pork. a butter knife just won't cut it and you don't want to be handing or passing around your paring knives. 

  • fillet - long, slim blade that has a bit of flex to it. ideal for filleting or removing skin from fish. 

IMG_0835.JPG

and now, on to the main event. the three work horses of the kitchen. 

  • chef's knife - a larger, long blade with a pointed end. ideal for breaking down poultry or trimming up beef or pork. the rounded blade makes it ideal for the rocking motion required of chopping lots of herbs, vegetables and fruit. your most versatile, every day knife. great first knife. 

  • paring knife - basically the baby version of your chef's knife. it has the capabilities of the it's larger brother, but it is necessary for more delicate tasks. great for garlic, and smaller fruits and veggies. 

  • serrated knife - for the full break down of the serrated knife you can read it's own blog post HERE. but it is ideal for tomatoes and slicing bread. if you do not use an insanely sharp knife or a serrated knife, you will smash tomatoes while slicing them and all the delicious insides will squirt out. there is also no other way to cut bread. any other knife will smash your bread beyond recognition. 

IMG_0836.JPG

i hope this helped shed some light on the ins and outs of kitchen knives. sharp knives and the right tool will make cooking fun and enjoyable instead of challenging and stressful. 

xo, a